How to Reduce Image Size in KB Without Losing Quality (or Making It Too Small)
You have a photo. It looks fine on your phone. But the moment you try to upload it somewhere — a university portal, a job application, or a government form — you get an error: "File size must be between 100 KB and 500 KB." Your photo is either too small (67 KB) or way too large (4 MB). Either way, you are stuck.
I have been through this exact situation twice. Once for a university application, once for a government document portal. Both times I had a perfectly good photo of myself — decent lighting, neutral background, not blurry — and both times the upload form had requirements that felt designed by someone who genuinely hated me. The instinct is to search "how to reduce image size in KB" and end up with tools that compress your photo into something grainy and unacceptable. That is the wrong direction entirely.
What I did not understand at the time — and what most people do not — is that file size and image dimensions are not the same thing. Cropping a photo makes it physically smaller on screen. But the KB value is governed by something else entirely: JPEG compression level, colour complexity, and DPI. You can have a tiny thumbnail that is 800 KB, and a large photo that is 40 KB. Understanding this is the key to resizing a photo without losing quality — and without accidentally going below the minimum.
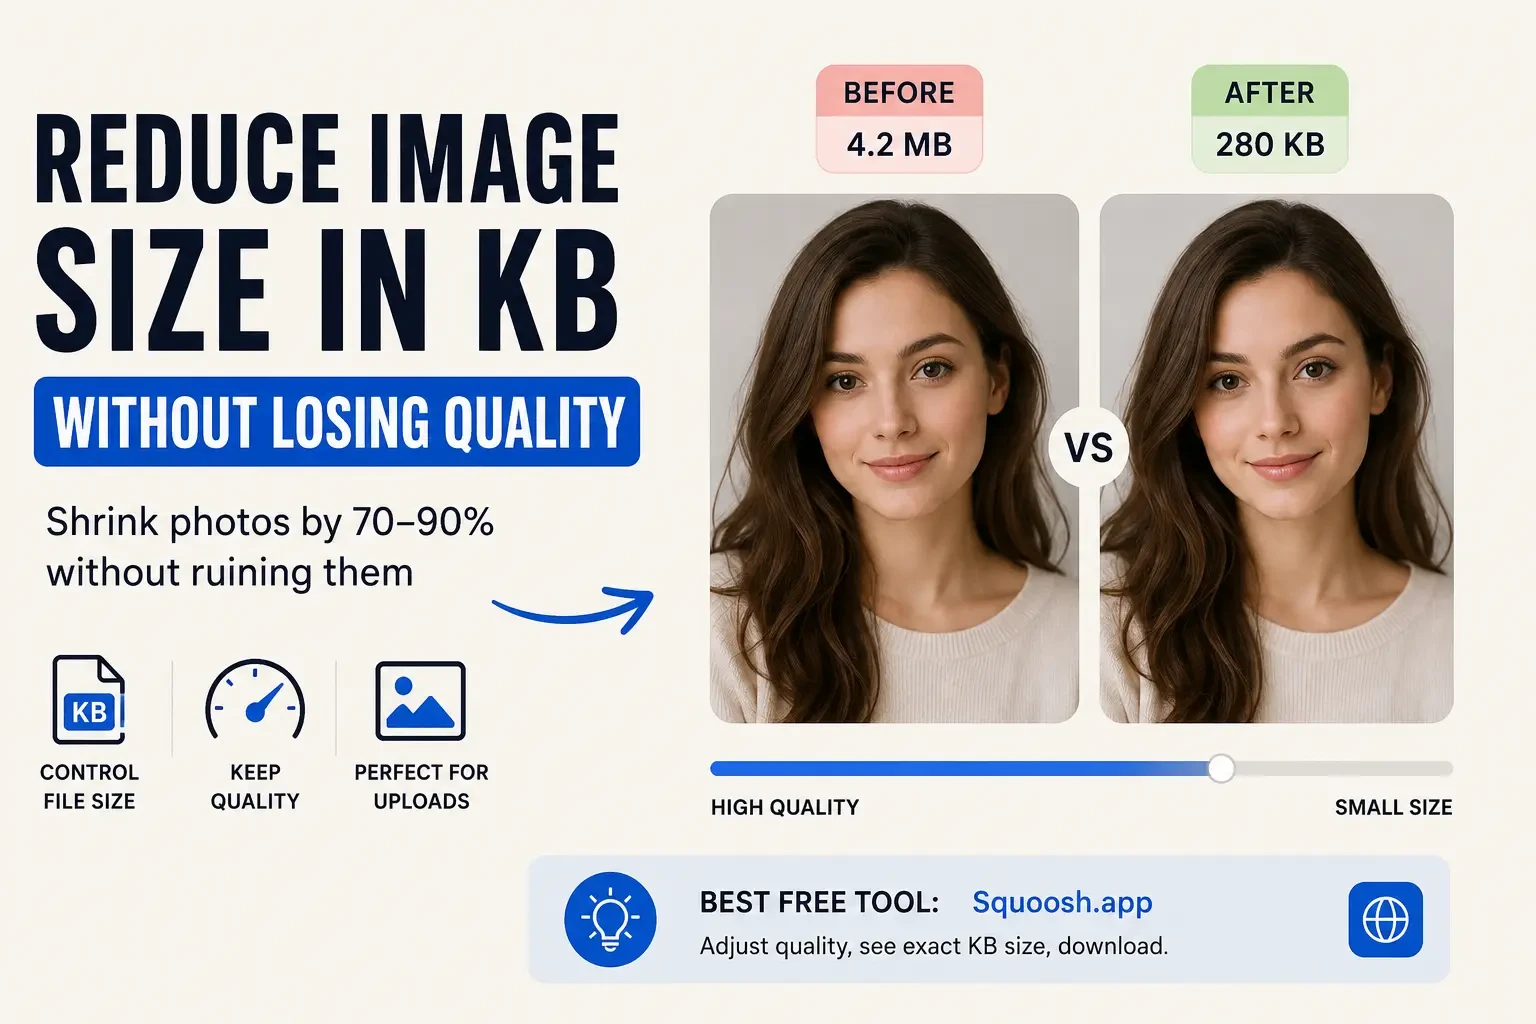
If you just need to reduce image size in KB right now: open Squoosh, drop your photo in, adjust the JPEG quality slider until the estimated file size shows your target KB, then download. No account, no software, 30 seconds.
Why Cropping Reduces Image Size in KB (Even When You Don't Want It To)
When you take a photo on a phone or DSLR, you are capturing millions of pixels of data. That full-resolution file — say, a 12 MP shot — carries a lot of information, which is why it tends to be 3–6 MB even after JPEG compression. The compression algorithm has more to work with.
The moment you crop, you are throwing away pixels. Fewer pixels means less data, which means the JPEG encoder has less to compress, and the output file ends up smaller. This is completely logical behaviour. It is just deeply inconvenient when a portal requires a minimum file size.
The portal's logic — even if it is clumsily implemented — is this: they want to ensure the photo is clear, properly taken, and not a pixelated mess. File size in KB is their (imperfect) proxy for that. So the solution is not to trick the system — it is to give the system what it actually wants: a decent-quality image in the right shape.
The Three Ways to Control Image Size in KB
Method 1 — Control JPEG Compression to Adjust KB
JPEG files have a quality slider, usually from 0 to 100. When you save a JPEG at 60% quality, the encoder aggressively discards colour data to compress the image and reduce KB. At 95% quality, almost nothing is discarded — and the file is much larger in KB, even at the same pixel dimensions.
Most basic crop tools save at 70–80% quality by default, which is why your cropped photo ends up under 100 KB. Re-export the same cropped image at 90–95% quality and you will likely hit the minimum without changing a single pixel of the framing. It is the single fastest way to increase image size in KB without any visible quality loss.
Open the cropped image in any photo editor
GIMP (free), Paint.NET (free on Windows), Preview on Mac, or Squoosh (browser).
Export as JPEG with quality 90–95%
In GIMP: File → Export As → JPEG → drag quality slider up. Watch the estimated file size update.
Check the output file size before uploading
Right-click the saved file → Properties (Windows) or Get Info (Mac). Confirm it falls within the required range.
Method 2 — Add White Canvas Padding (The Clean Way)
If your photo is in portrait (taller than wide) and the form wants 4:3 (landscape), you have two choices: crop in and lose parts of the photo, or add a white border on the sides to reach the target ratio.
This is exactly what passport photo booths do. The person is photographed in a fixed frame, and the remaining space is padded to hit the required dimensions. It looks professional, respects the composition, and adds a small amount of file size from the extra pixels — though you would still want to bump the quality setting too.
Image → Canvas Size → enter your target ratio dimensions (e.g., 800×600 for 4:3) → click "Center" → Flatten Image → Export as JPEG at 90%+. The background fills with white automatically.
Method 3 — Upsample First, Then Crop to Target Size
This is the most counterintuitive option, and it only makes sense in specific situations — but it works. If your original photo is very small in pixel dimensions (under 600px wide, say), you can scale it up first — say to 1200×900 — and then crop to the 4:3 target. Because you are working with a larger pixel canvas, the final cropped file will be larger in KB.
The image will not be sharper — upsampling does not add detail that was not there — but it will meet the file size requirement, and for a passport-style photo where you are standing still against a plain background, the softness is rarely noticeable at the sizes portals display.
Important: Always start from the original, uncompressed photo — not a screenshot or a previously compressed version. Every time you re-compress a JPEG, you lose a little quality. Start from the largest file you have.
Free Tools to Reduce (or Increase) Image Size in KB
If you do not have photo editing software installed, these browser-based tools let you control image KB size directly — all without creating an account:
| Tool | What it does well | Cost |
|---|---|---|
| Squoosh (squoosh.app) | Adjusts quality and resize in one view. Shows exact output file size in KB before downloading. Built by Google. | Free |
| ImageResizerAI (imageresizerai.com) | Client-side processing, no uploads. Supports JPG, PNG, WebP. Quality slider with live KB preview. | Free |
| ILoveIMG (iloveimg.com) | Resize, compress to target KB, crop to aspect ratio — all separate tools, easy to combine. | Free |
| Photopea (photopea.com) | Photoshop-like interface, fully in browser. Canvas padding, quality export, everything. | Free |
My personal go-to for this exact problem is Squoosh. You paste or drop your image, set the resize dimensions, adjust the JPEG quality slider, and the estimated output size updates live in the bottom bar. No account needed, no watermark.
How to Reduce Image Size in KB (When Your File Is Too Large)
The opposite problem — needing to reduce image KB for an upload ceiling (e.g., under 500 KB) — is much easier to solve. Here is what works:
- Lower JPEG quality to 75–80%. That level of compression is usually invisible to the human eye for a photo of a face, and will almost certainly bring you under 500 KB.
- Reduce pixel dimensions slightly. An 800×600 crop at 85% quality will almost always sit comfortably between 100 and 500 KB.
- Switch to WebP format. WebP at 80% quality is often 25-35% smaller than JPEG at the same visual quality.
- Use a dedicated compressor. Tools like TinyPNG or ImageResizerAI can automatically find the optimal balance.
Target File Sizes by Use Case
| Use Case | Ideal File Size | Format |
|---|---|---|
| Passport / Visa photo | 100–500 KB | JPEG at 90%+ |
| University application photo | 100–300 KB | JPEG at 85–90% |
| Government form upload | 50–200 KB | JPEG at 80–85% |
| Website hero image | Under 200 KB | WebP at 80–85% |
| Blog post image | Under 100 KB | WebP at 75–80% |
| Email attachment | Under 1 MB total | JPEG at 70–80% |
Why Universities Have These File Size Rules
It is worth saying plainly: the photo requirements on university application portals are not carefully engineered specifications. They were written by an administrator some years ago, possibly copy-pasted from government ID guidelines, and have rarely been revisited since. The 4:3 ratio is a legacy of old display standards. The 100–500 KB window is a rough attempt to catch both tiny thumbnails and enormous uncompressed files.
The spirit of the requirement is: a clear, recognisable, appropriately framed photo of your face, in a format our systems can handle. Meeting the letter of those specs is a technical puzzle, not a referendum on the quality of your application.
Frequently Asked Questions
How do I reduce image size in KB without losing quality?
The most effective way is to lower the JPEG compression level — not the pixel dimensions. Export your image at 75–85% JPEG quality using a tool like Squoosh or GIMP. At that range, the image looks visually identical to the naked eye but the file size in KB drops significantly. Only reduce pixel dimensions as a last resort, since that genuinely removes detail.
Why is my image file size too small after cropping?
Cropping removes pixels from the image, which directly reduces the amount of data the JPEG encoder has to work with — so the output file ends up smaller in KB. To bring it back up, re-export the cropped image at a higher JPEG quality setting (90–95%). Most basic crop tools default to 70–80% quality, which is why the file shrinks more than expected.
What is the best free tool to reduce image size in KB?
Squoosh (squoosh.app) is the most practical option for this specific task. It shows you the exact output file size in KB as you adjust the quality slider and resize dimensions — before you download anything. It is browser-based, completely free, requires no account, and supports JPEG, WebP, and PNG.
Can I increase image file size in KB without changing how it looks?
Yes — and this is exactly what most people need for document upload portals. Re-saving a JPEG at higher quality (95%+) increases the file size in KB with no visible change to the image. Alternatively, slightly increasing the canvas size by adding a white border to hit a target aspect ratio also adds a few KB. Neither approach degrades the photo in any way that a human reviewer would notice.
Does converting PNG to JPEG reduce image size in KB?
Almost always, yes. PNG is a lossless format — it stores every pixel in full detail, which makes files significantly larger. A photograph saved as PNG can easily be 2–5× larger than the same image saved as JPEG at 85% quality. For passport-style photos and document uploads, JPEG is the correct format. Convert via any photo editor or Squoosh, and the KB drop will be immediate and dramatic.
What is the difference between resizing and compressing?
Resizing changes the pixel dimensions (width × height) of an image. Compressing changes the file size in KB by adjusting how much data is stored. You can resize an image to be smaller in pixels but still have a large KB if you save at high quality. Conversely, you can keep the same pixel dimensions but dramatically reduce KB by lowering JPEG quality.
The Bottom Line
If you are staring at a deadline and just need the thing submitted: open Squoosh, drop your photo in, crop to 4:3 using the resize tool, set quality to 90, and watch the KB value update live in the corner. If it is too low, nudge quality up. If you need to reduce image size in KB because it is too high, nudge quality down. Download, upload, done. Five minutes, no software, no account.
For ongoing needs, remember the golden rule: JPEG quality controls KB without changing visible size. Pixel dimensions control KB by removing actual image data. Choose the right tool for what you actually need.
Try Free Image Resizer & Compressor
Reduce image size in KB instantly — no uploads, no watermarks, just fast client-side processing.
Resize & Compress NowAlso Read: